

How to Toggle Place Labels in Travel Animator
Travel Animator has now toggled the place labels to give you more control over how your map looks, whether you want a cleaner view without names or prefer to highlight specific destinations with clear labels.
Imagine you’re creating a travel animation for a luxury cruise trip across Europe. You want to showcase the smooth route and stunning visuals without overwhelming the map with too many city names. This is where toggling place labels becomes useful. You can turn them off for a minimal experience or turn them on to highlight whole stops for a more informative video.
Let’s explore how to toggle place labels in Travel Animator and when you should toggle them.
What Are Place Labels in the Travel Animator?
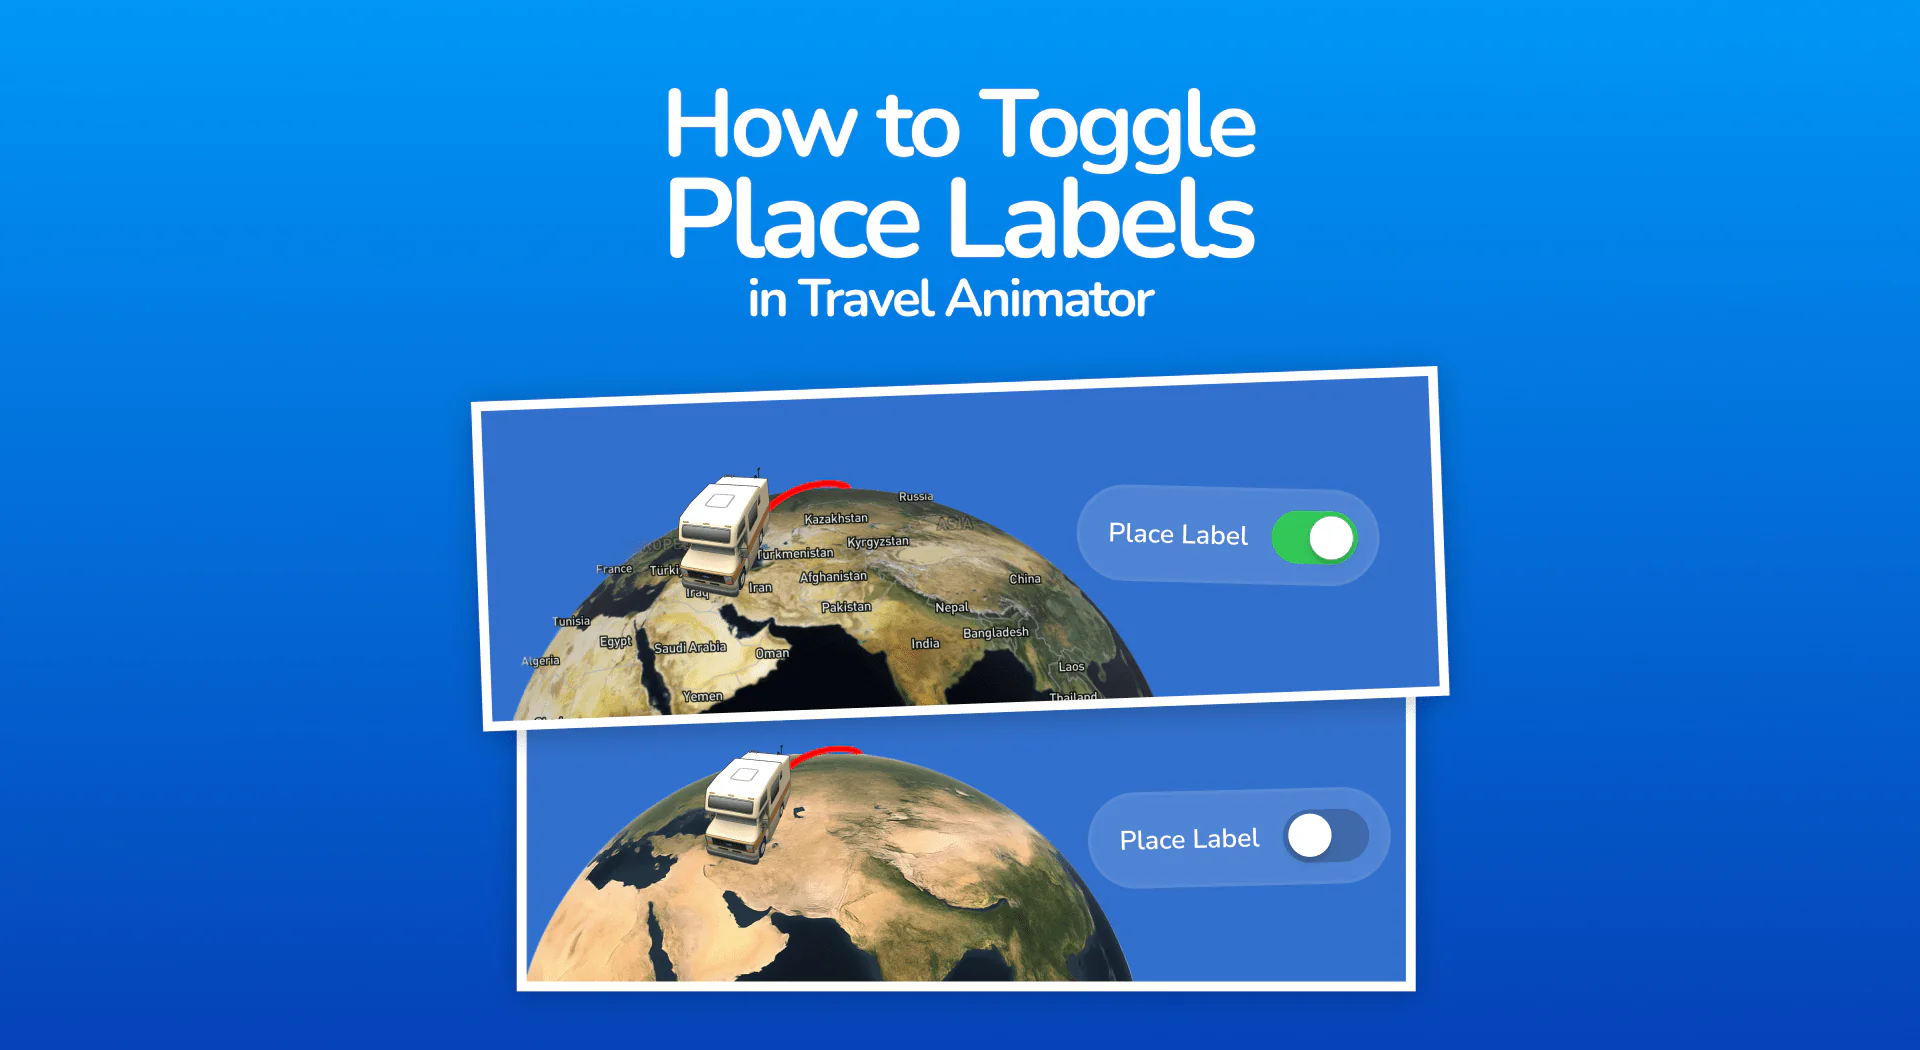
Place labels are the small text names that appear on the animated map, indicating the destination names. These labels automatically appear on the map when you add the locations to your route, and they help to identify each location for the viewer.
They display which cities you visited, making the video informative and adding structure to your travel map, helping it be organized and professional.
When Should You Toggle Place Labels?
Using place labels depends on your video style and what you are trying to communicate through the video.
Turn on the place labels when you’re making an informative travel video for YouTube or a presentation. If the route is not a well-known place, it’s better to name it when you’re working on a client’s project and need to show specific destinations, etc.
Turn off place labels if you need a clean look without text, or your video already has a voiceover or a subtitle that mentions the location. Minimal visual works better for Instagram Reels and TikTok.
Steps to Toggle Place Labels in Travel Animator
- Open Travel Animator and complete the projects by adding destinations using different ways.
- Add images, labels, and models for each destination and stop.
- Preview video and tap on Map style.
- You can toggle on and off the Place Labels here.
- Toggle on to enable the place labels in the map and off to disable them.
- You can also change the map style from there.
- Adjust the feature you need and export the animation to your device.
- You can directly share content on various platforms from within the app itself.
Tips for Using Place Labels Effectively in Travel Animator
- Use custom labels to personalize your map instead of automated place labels.
- If your route has too many labels, it will overwhelm the way. In such cases, toggle them off and use the label feature to add an important location name.
- Use labels based on different platforms. For YouTube, showing labels works best, and for Instagram Reels or Stories, clean videos without labels look professional.
Why Would You Want to Toggle Place Labels in Travel Animator?
When creating a travel animation, every detail matters, including how the map looks. Place labels are the names of cities, countries, or landmarks that appear along your route. Sometimes, showing these labels helps viewers understand the journey better. Other times, too many labels can distract from the visual appeal of the animation. Explore the features in Travel Animator today.

Jaseel S is the CEO and founder of Lascade, the app studio behind Travel Animator. He leads a team of 40+ engineers and designers building consumer mobile apps.
Related Articles
How to Customize the Scene Style of Your Animation Video in TravelAnimator

How to Add Your Brand Logo to Travel Animator Videos

How to Add Your Avatar in TravelAnimator Videos

How Can I Access Routes Saved on One Device from Another Device in Travel Animator?

How to Add 3D Elements to Your TravelAnimator Videos


