With the latest update in the Travel Animator app, you can now add a cover image to your animation. This feature allows you to create a strong opening frame, turning your travel route into a complete story from the very first second.
Whether you’re creating travel reels, YouTube intros, or itinerary videos, using a cover image helps your content look more polished, engaging, and professional.
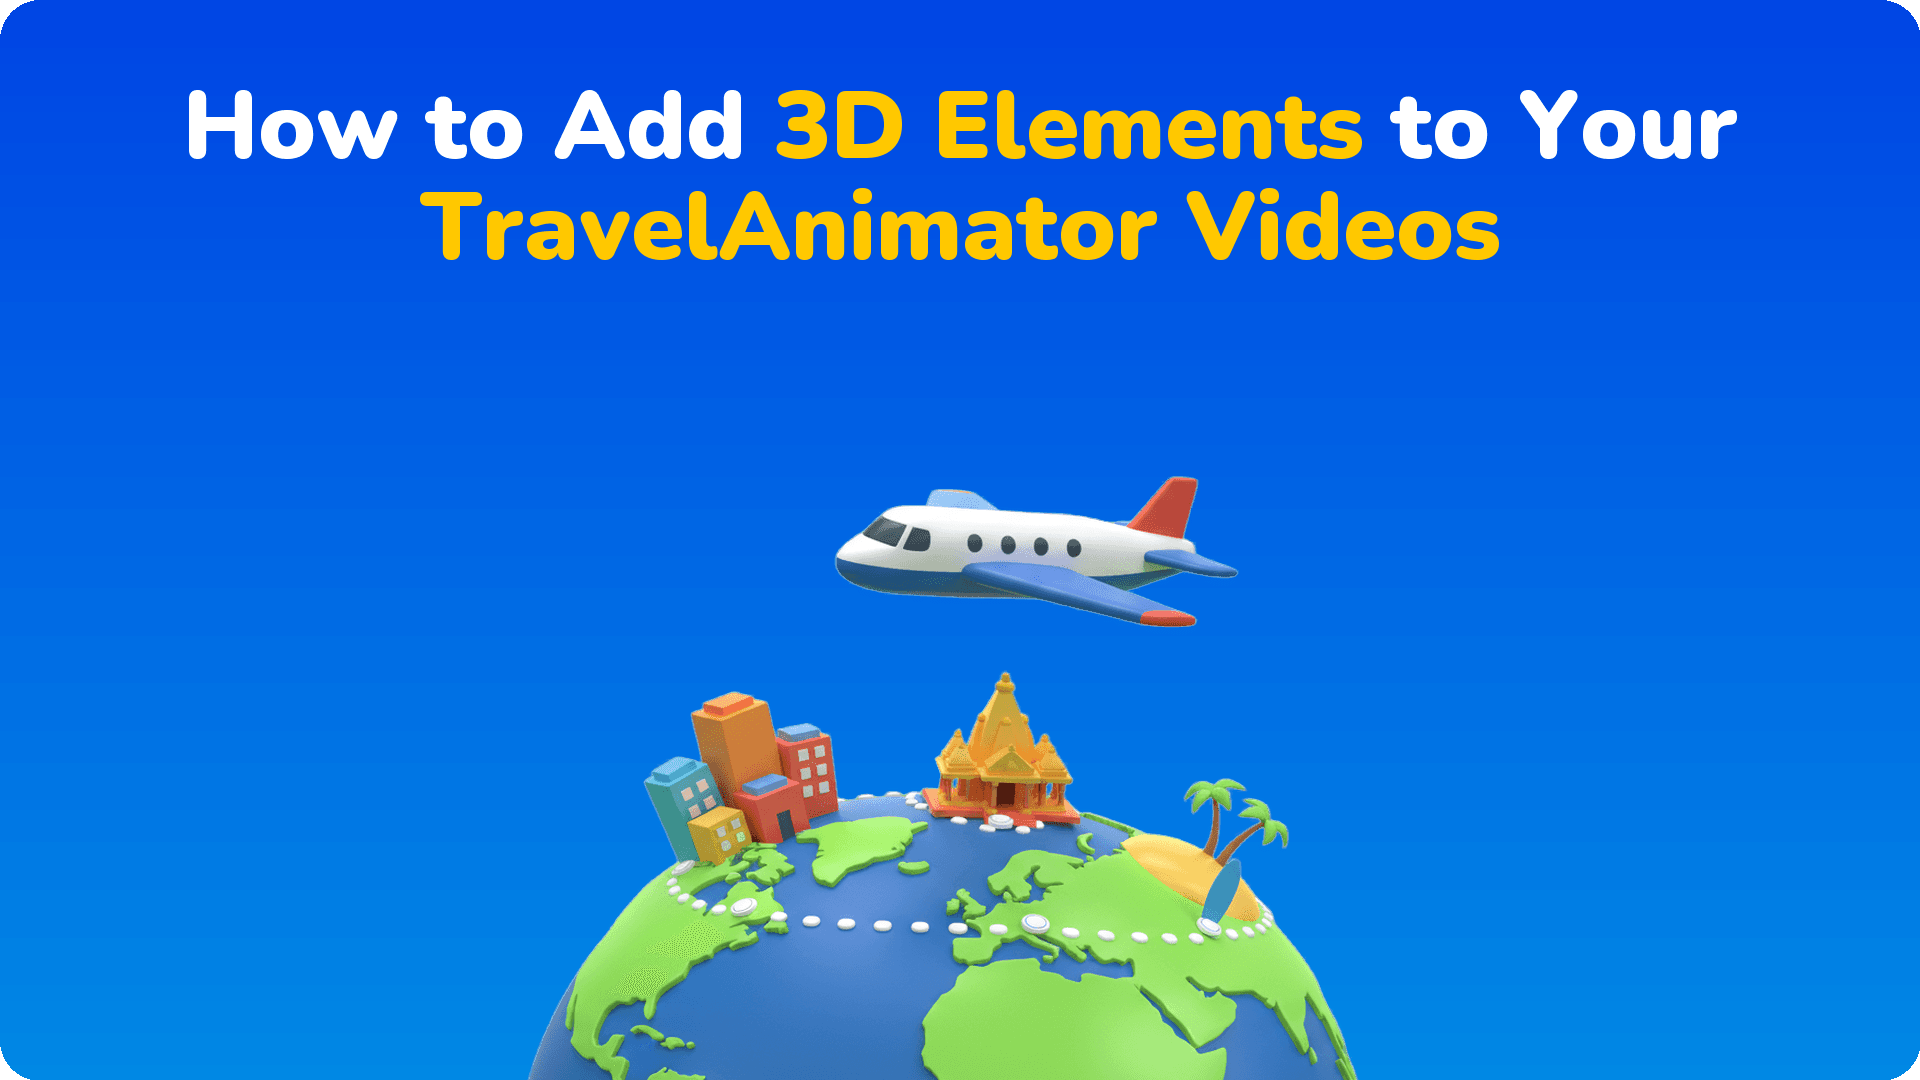
In this guide, we will show you how to add a cover image to your TravelAnimator video, customize it with templates, and follow best practices and creative ideas.
What is a Cover Image in Travel Animator?
A cover image in Travel Animator is the intro frame of your video that appears before the animation begins. It acts like a title screen or preview, giving viewers a quick idea of what your journey is about.
Instead of starting your animation suddenly, the cover image lets you introduce your journey, highlight key destinations, add a title or context, and set the tone for your video.
Step-by-Step: How to Set a Cover Image in Travel Animator
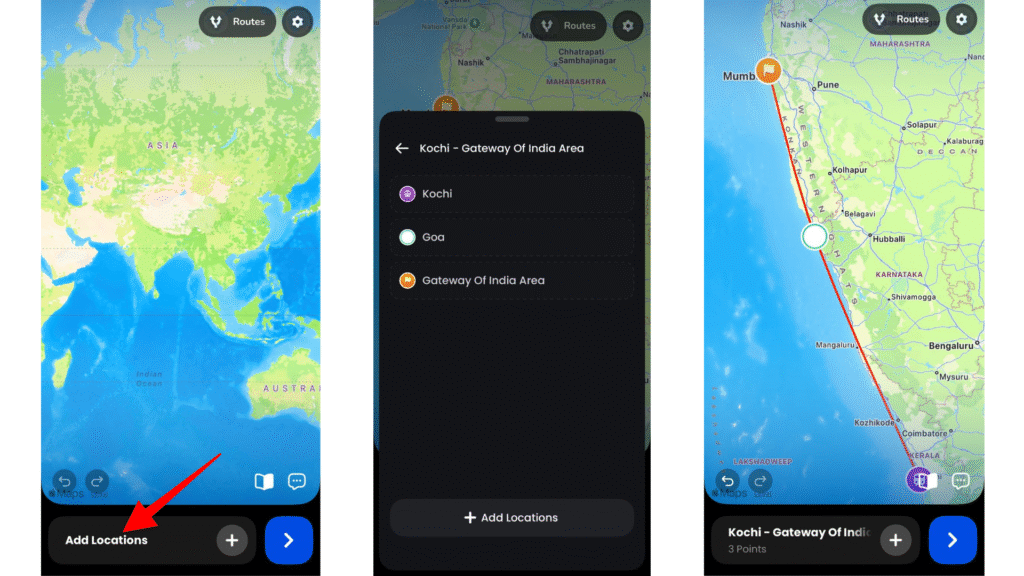
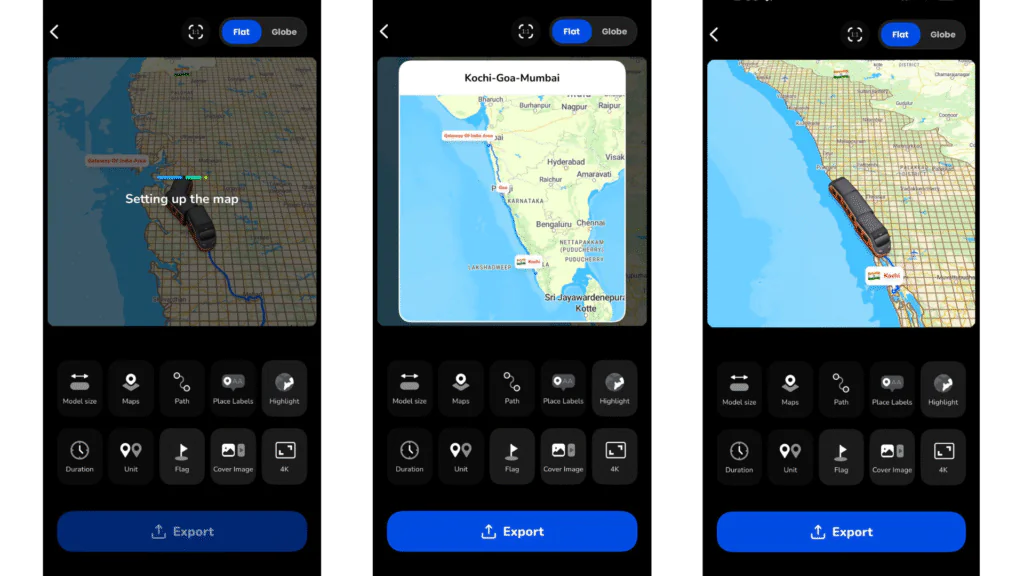
1.Open the Travel Animator app and complete your route animation.
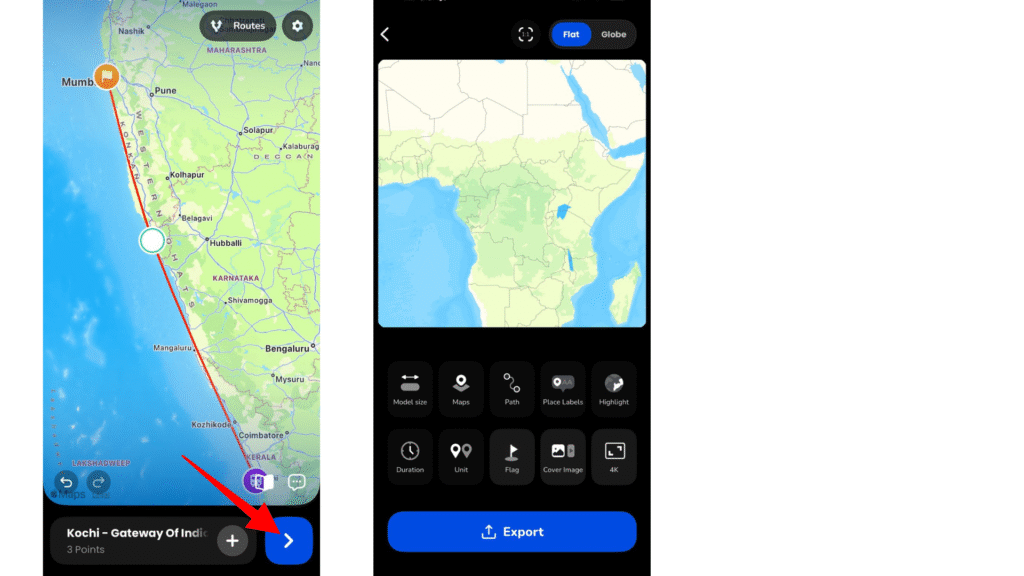
2. Go to the preview and set up your animation.
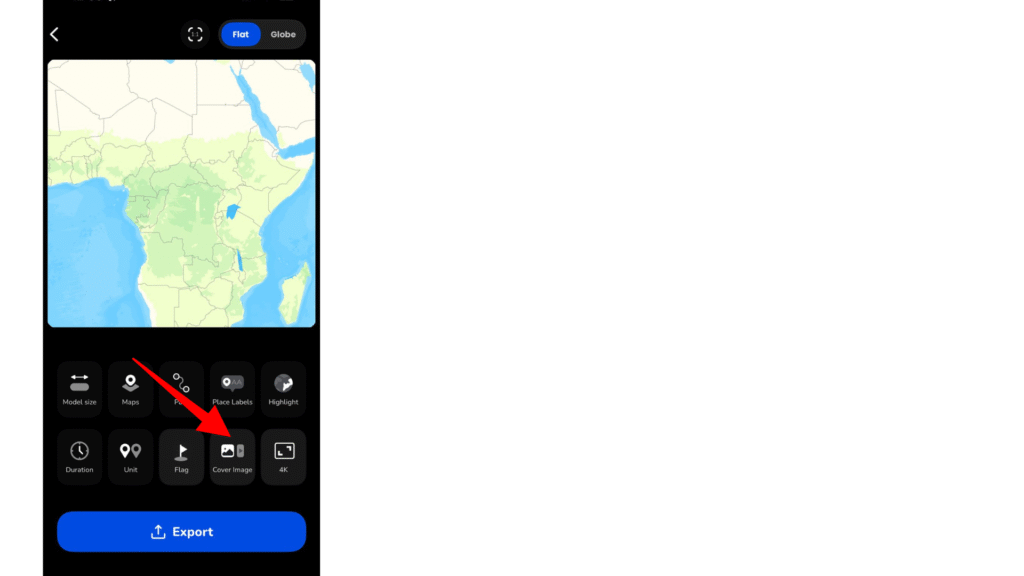
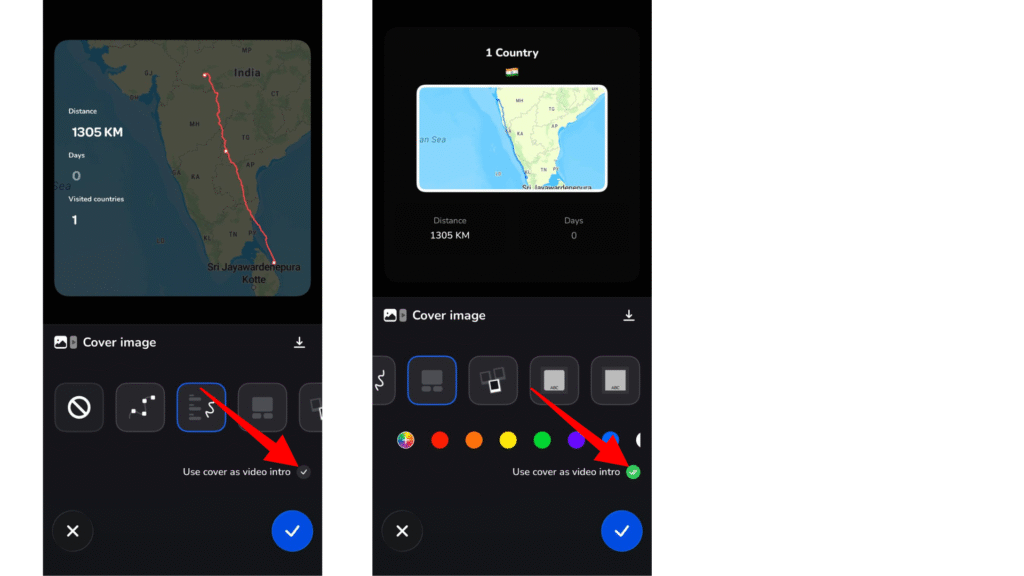
3. Tap on the Cover Image option available in the settings panel.
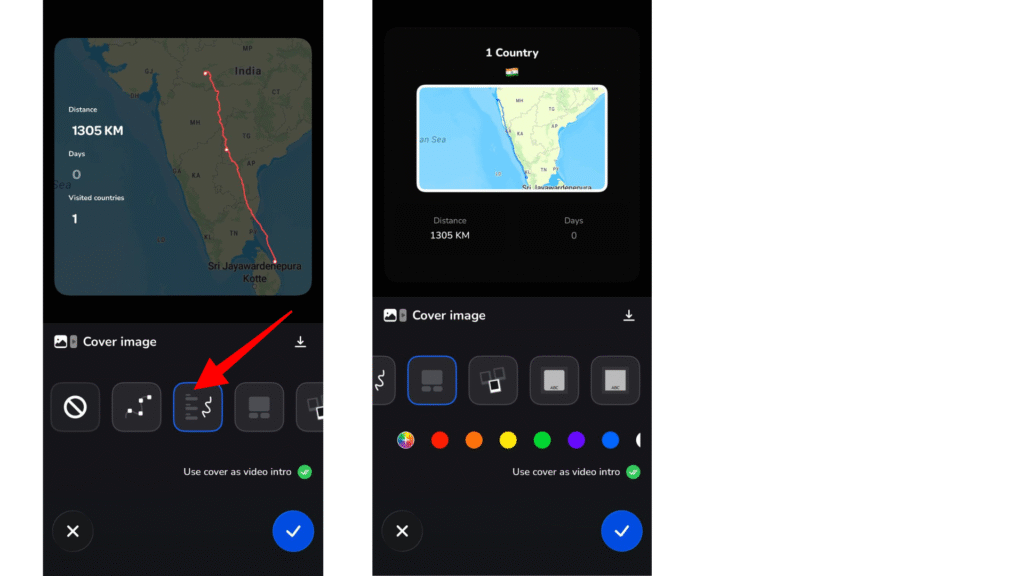
4. Choose a layout style that fits your video design.
5. Enable the toggle Use cover as video intro to include it at the beginning of your video.
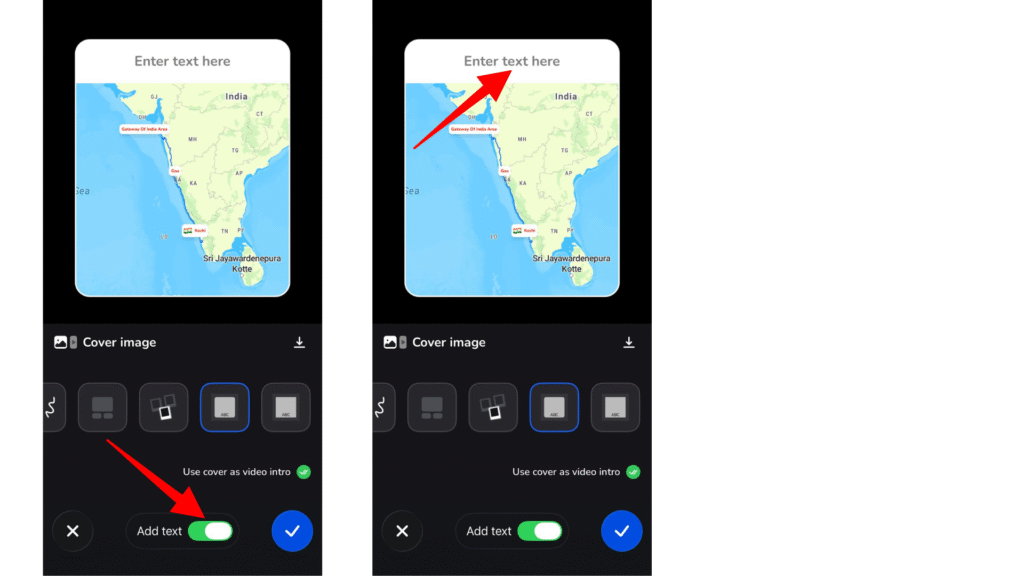
6. Turn on the Add Text option if you want to include a title or any text.
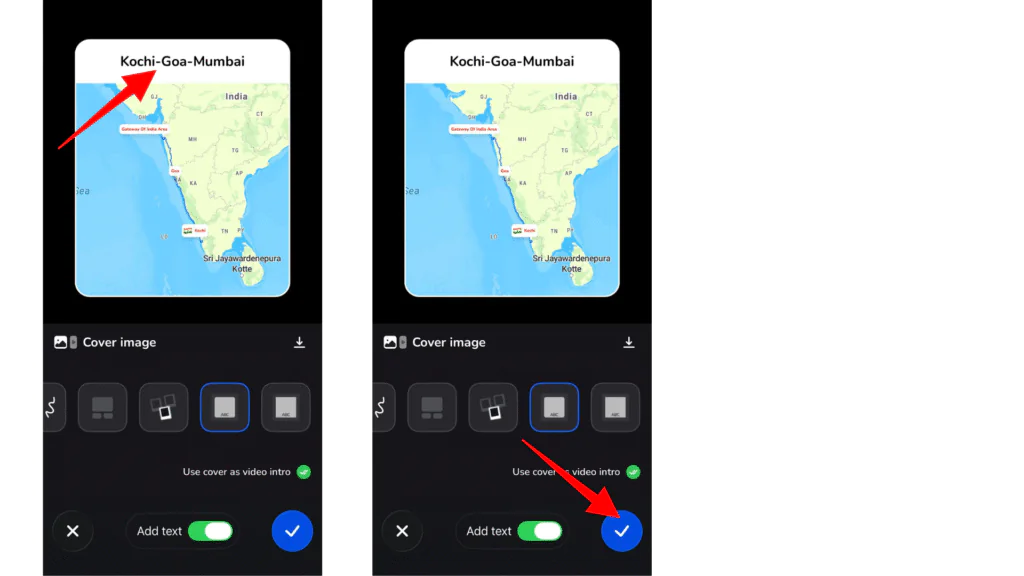
7. After entering the text, tap the confirm button to apply the cover image.
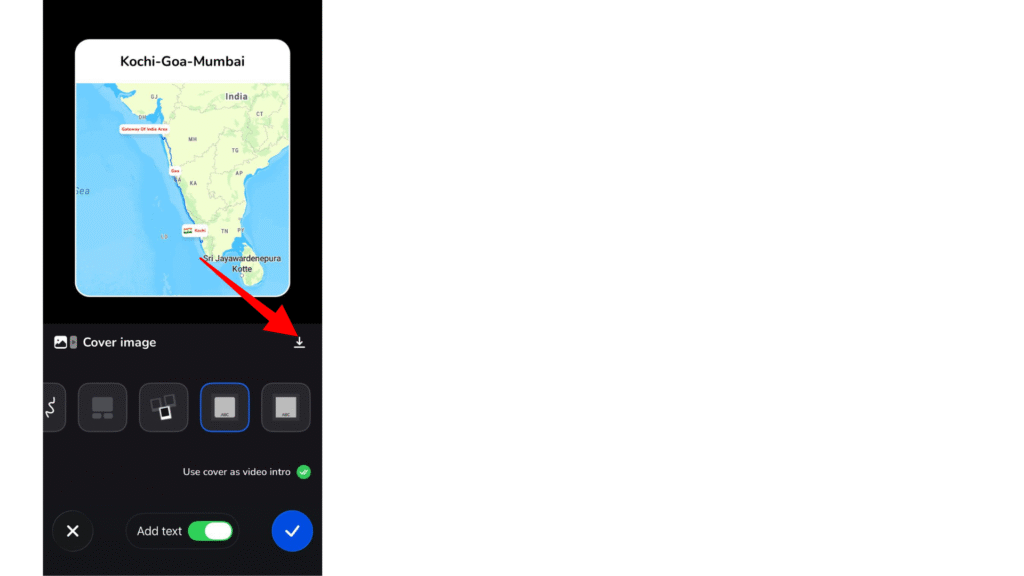
8. You can download the cover image from the options to use it as a story.
9. Preview your video to ensure everything looks perfect.
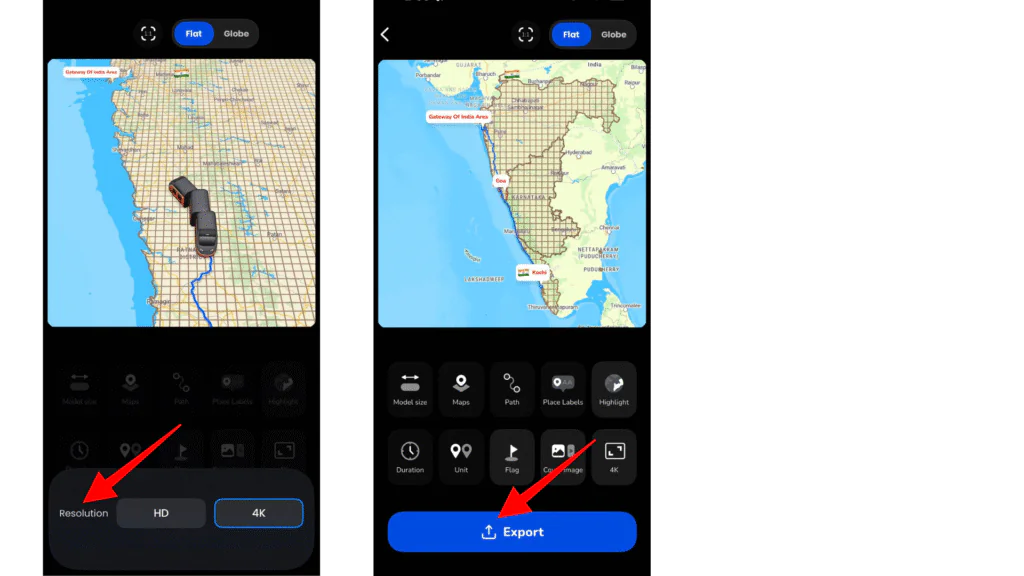
10. Export your video in HD or 4K quality.
Make Your Travel Videos Stand Out from the First Frame
The cover image feature in the Travel Animator app is a simple yet powerful way to elevate your travel videos. It transforms your animation from a basic route into a complete visual story with a strong beginning. By adding a well-designed cover image, you not only improve the look of your video but also capture your audience’s attention instantly.
Download TravelAnimator now from the App Store or the Play Store and make your Travel Video stand out.
Jaseel S is the CEO and founder of Lascade, the app studio behind TravelAnimator. He leads a team of 40+ engineers and designers building consumer mobile apps.