With the latest update in the Travel Animator app, you can now highlight countries, states, or regions directly on your map. This feature allows you to visually emphasize locations, making your animations more informative, engaging, and visually appealing.
Whether you’re showcasing visited countries, focusing on a specific region, or creating educational travel content, the highlight feature adds a new layer of storytelling to your videos.
In this guide, you will explore how to highlight specific areas of your Travel Animator Maps, when to use and some creative ideas to use this new feature.
What is the Highlight Feature in Travel Animator?
The Highlight feature allows you to visually mark specific areas on the map, such as countries, states, or regions. Instead of only showing a route line, you can now emphasize entire locations by applying colors, patterns, or styles to them. For example, if your journey includes multiple cities in India, you can highlight the entire country or specific states like Kerala or Tamil Nadu, helping viewers quickly understand the geographical context of your journey.
The 2026 update introduces a redesigned and powerful highlight system that gives you more control and flexibility.
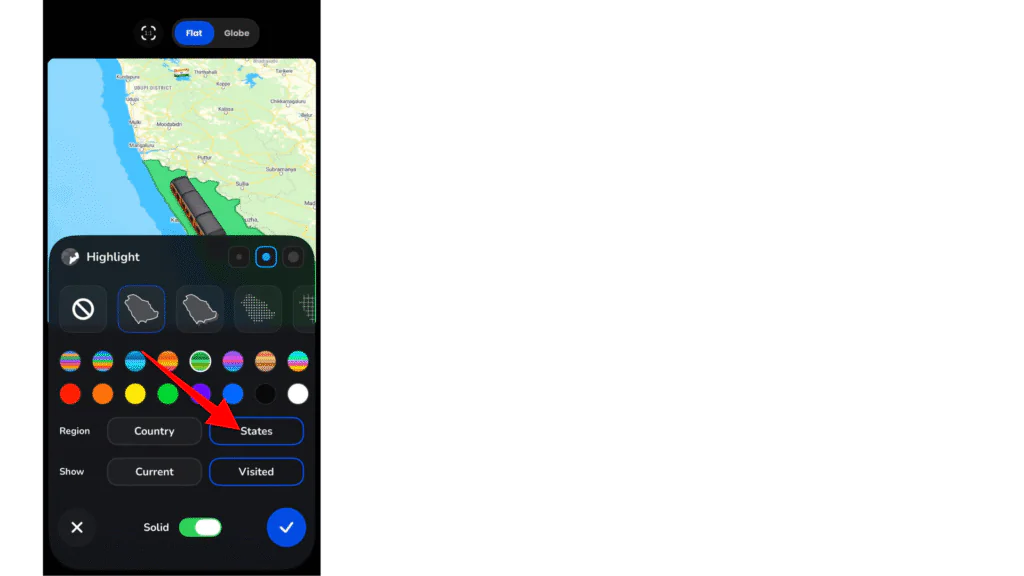
A dedicated Highlight panel in the editing interface
Options to highlight by Country, State, or Region
Toggle between Current and Visited views
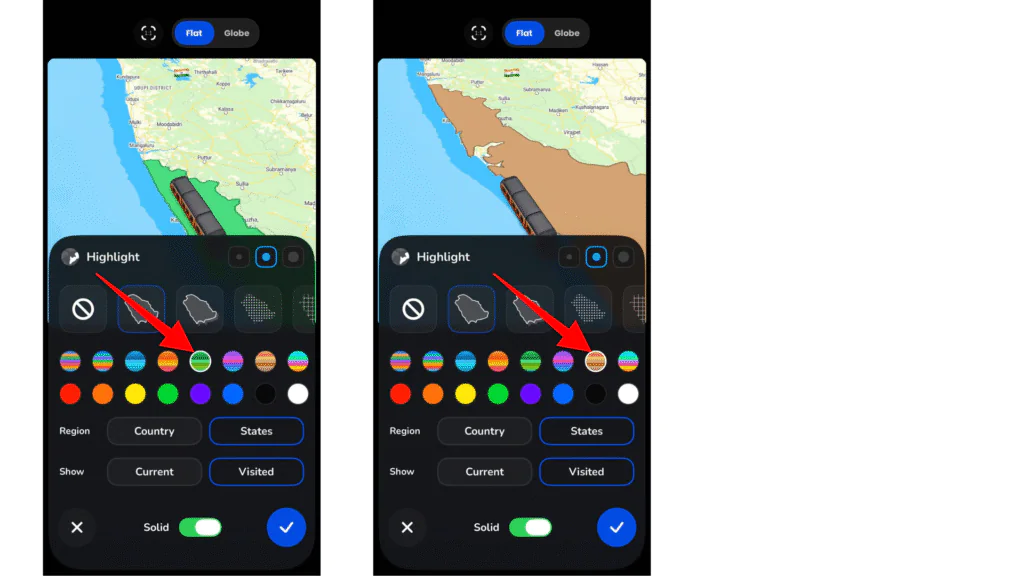
Multiple colour options, including solid and gradient styles
Pattern styles such as filled, dotted, and grid effects
A Solid toggle to switch between filled and styled highlights
Real-time preview of changes before applying
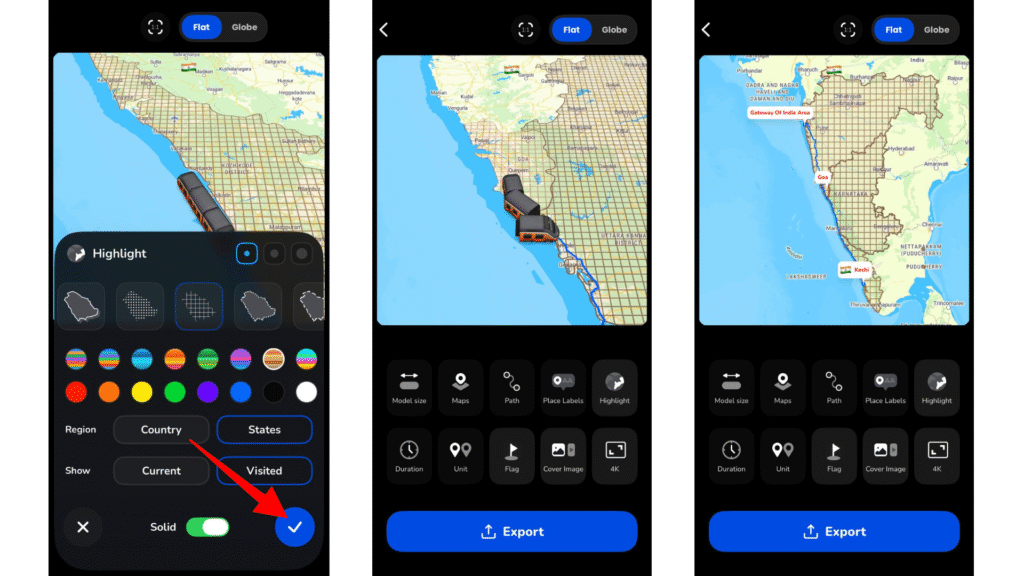
Step-by-Step: How to Highlight Specific Areas in Travel Animator
Follow these steps to highlight areas in your travel animation.
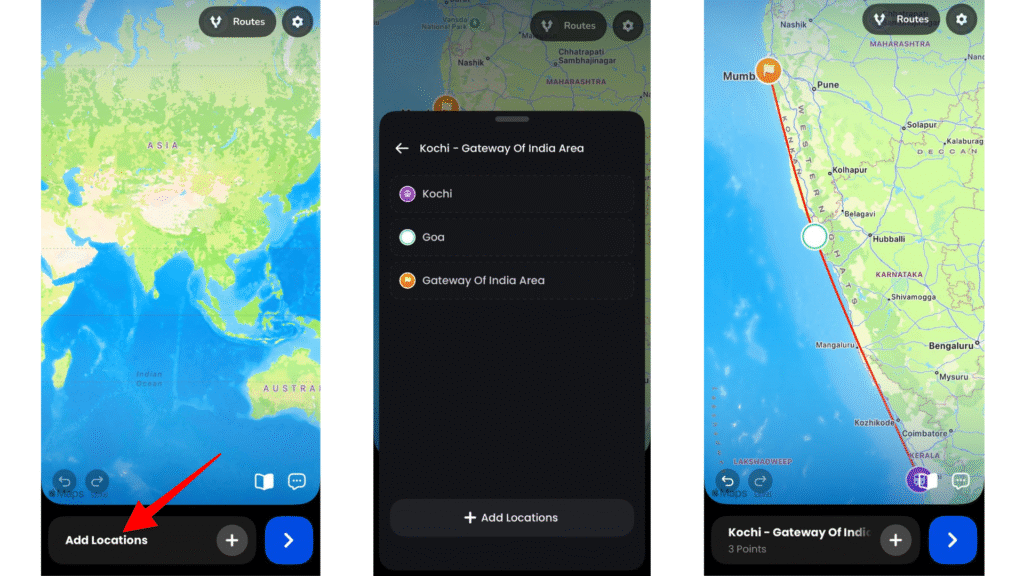
Open the Travel Animator app and complete your route setup.
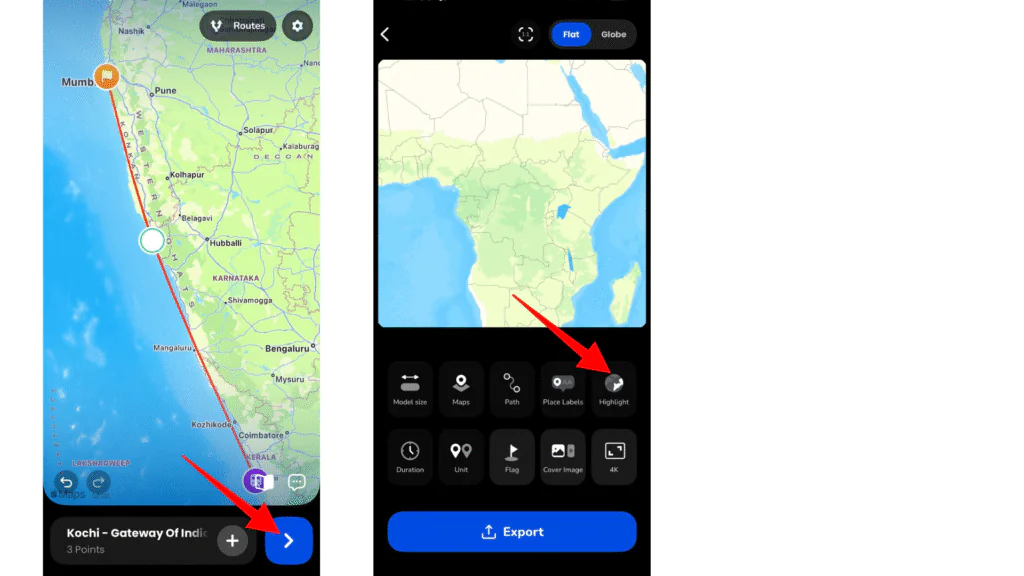
2. Navigate to the preview editing screen where customization options are available, then tap the Highlight option in the settings panel.
3. Choose the type of area you want to highlight – Country or State.
4. Choose a colour or style from the available palette.
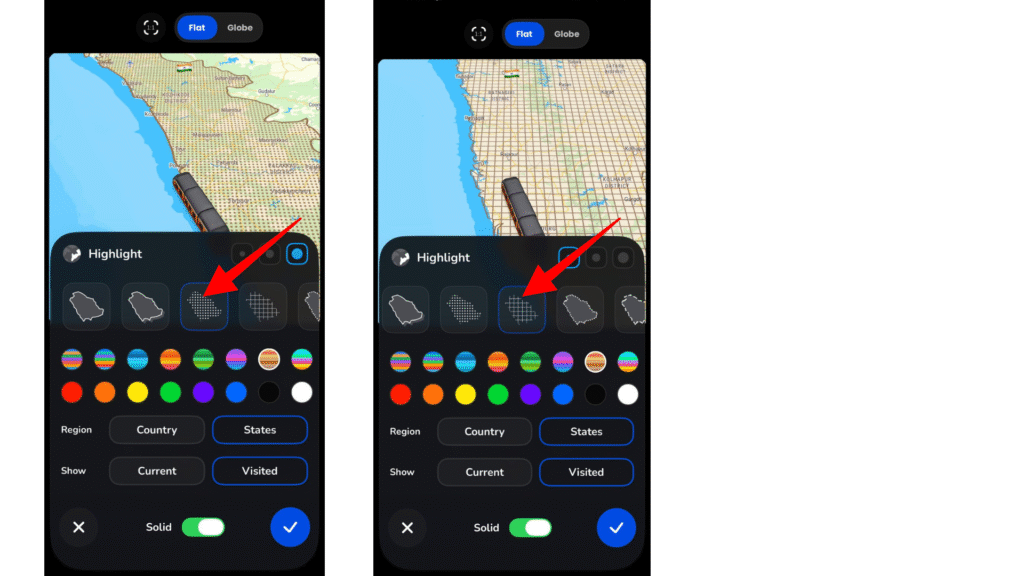
5. Apply a pattern, if needed, such as a dotted or grid style.
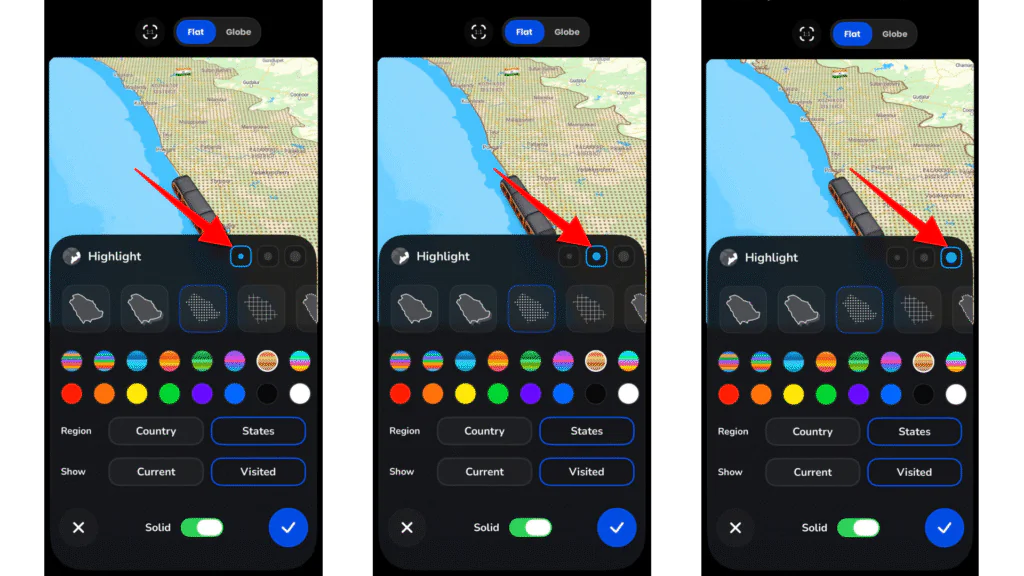
6. You can choose the border thickness from the available three options.
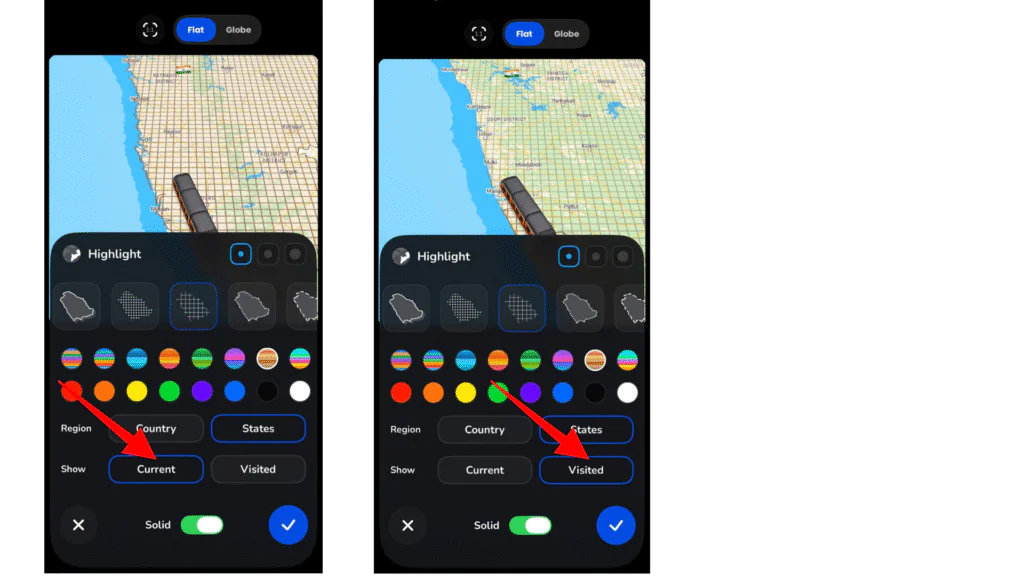
7. Use the Visited or Current toggle depending on your storytelling purpose.
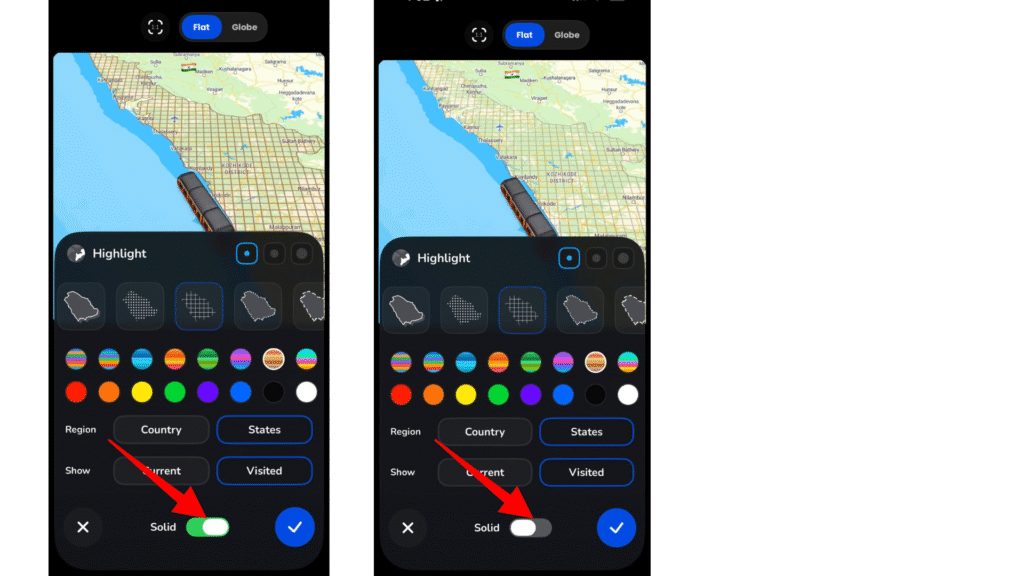
8. Turn on the Solid option for a fully filled highlight, or turn it off to use a patterned or textured fill style.
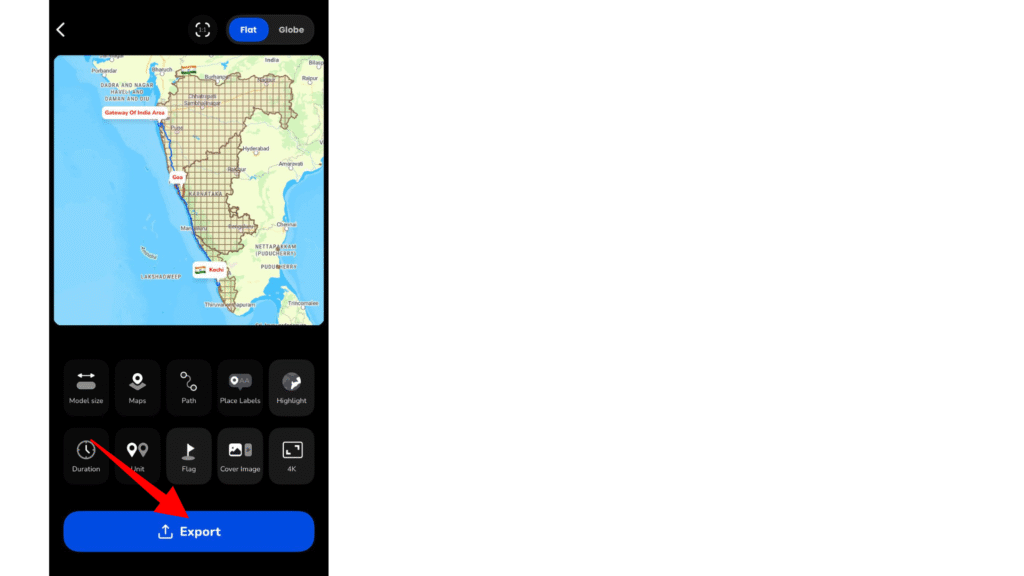
9. Tap the confirm button to apply the highlight and preview your animation to ensure the highlight looks correct.
10. Make adjustments if needed, and then export your animation video.
Tips: Avoid colours that blend into the map background, keep your style consistent across the animation, and always preview before exporting to catch any misaligned highlights.
Make Your Travel Maps More Visual and Informative
The Highlight feature helps you go beyond simple route animations, adding context and clarity to your travel stories. Whether you’re a solo creator, educator, or travel agency, highlighting turns a plain route into a map that tells the bigger story. Try it in your next animation and see how it changes how viewers follow your journey.
Jaseel S is the CEO and founder of Lascade, the app studio behind TravelAnimator. He leads a team of 40+ engineers and designers building consumer mobile apps.