Download TravelAnimator Now from the Play Store or App Store.
How to Change the App Language in Travel Animator?
 Jaseel S6 min read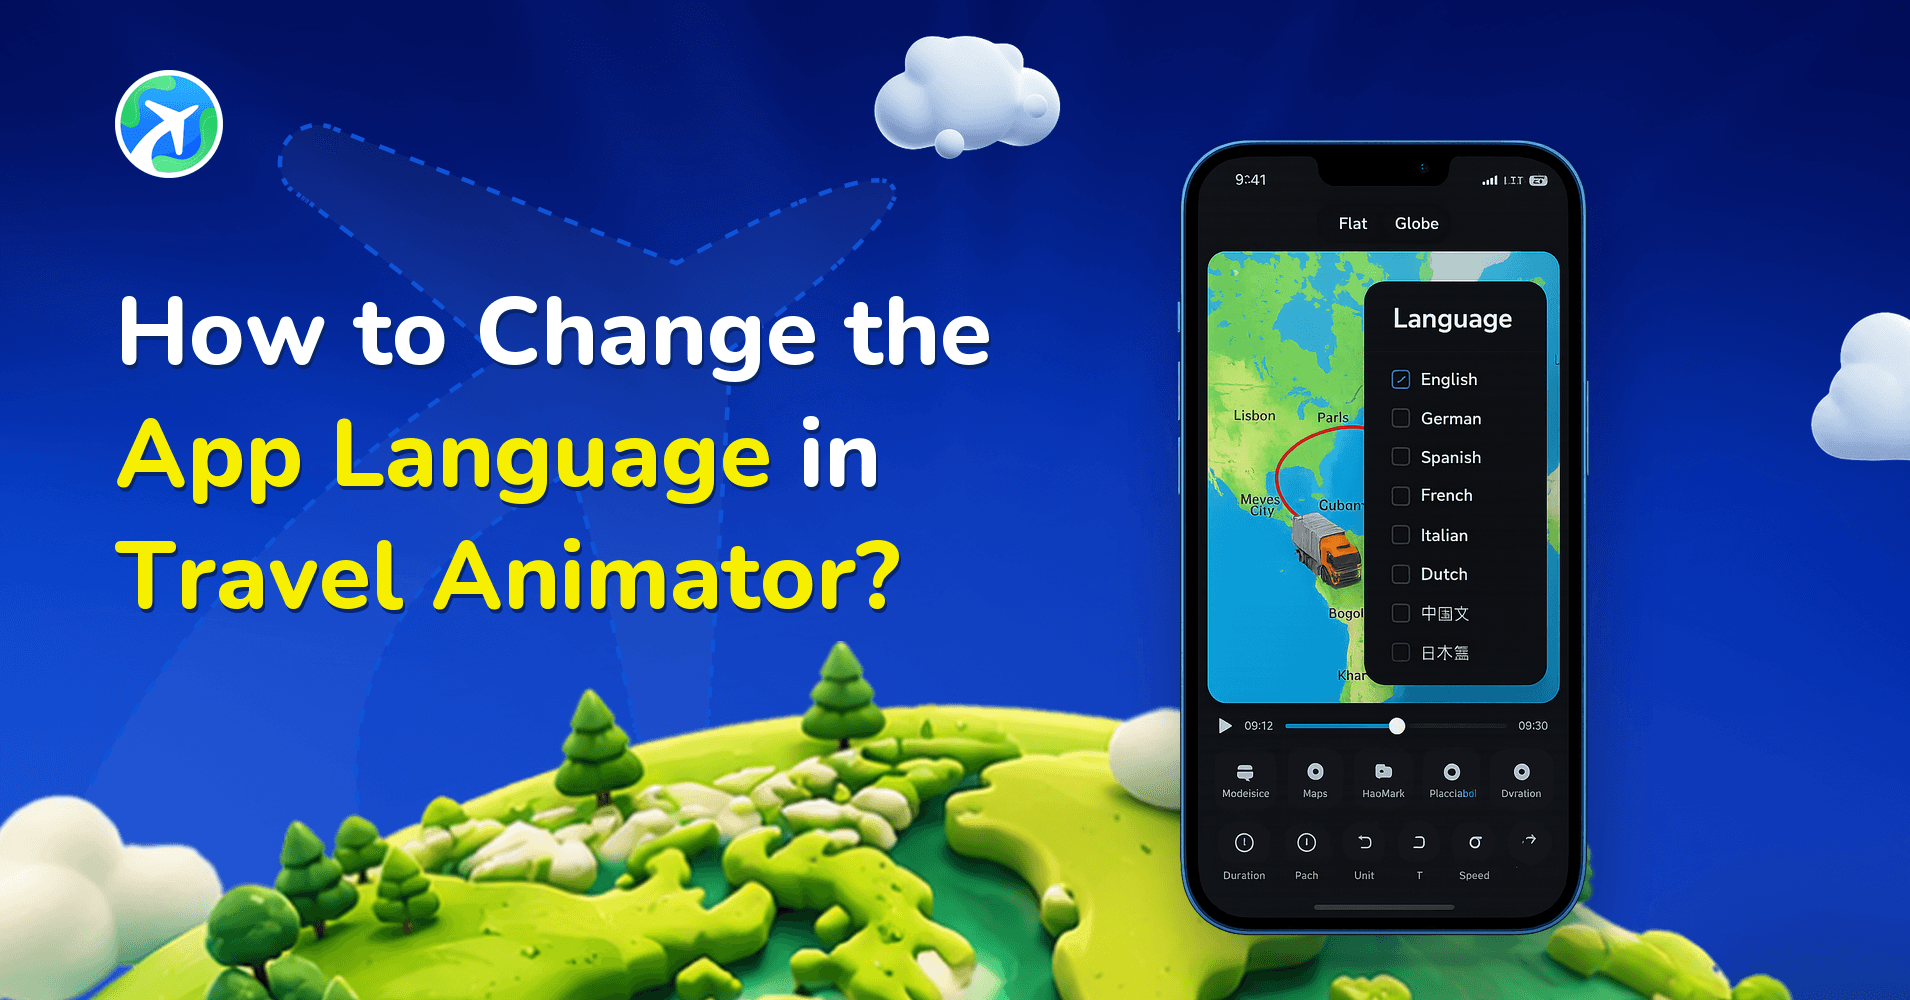
In this article 9 sections
Travel Animator offers different languages to ensure that creators can work in the language they understand best. This not only makes the app more user-friendly but also reduces confusion when creating, editing, or sharing animated travel videos.
Whether you’re a beginner or a professional content creator, having language flexibility makes the process smoother and more accessible, so you can focus on creating your story, not the settings.
Let’s explore how to change the language in a Travel Animator, why it is important, and when and why to change the Language.
Why Language Options in Travel Animator?
Travel Animator is built for a global community of creators, travelers, and storytellers. Since our users come from different countries and regions, not everyone is comfortable using the app in English. Many people also set up their devices in their native language, which makes it easier to navigate the apps and tools they use every day.
The default language in Travel Animator is automatically set based on the language of your device. For example, if your phone is set to Spanish, the app will open in Spanish by default. This ensures a seamless experience without the need for manual adjustments when you first start using the app.
When and Why to Change the Language of the Travel Animator App?
- Use the language that is easier for you if you are someone who is not good at English or the default language.
- The animated map can change the language for those who need a place name in any language.
- Choose the right language if you are a business and your target audience is a specific country/language.
- Travelers or content creators traveling in different countries and creating different travel animations with the same country name for locations can change the language.
How to Change the Language in Travel Animator (Step-by-Step Guide)
- Download the Travel Animator app and open it.
- Go to the main settings from the top right side of the home screen.
- Scroll down till you see the “Language” from the Account section.
- Tap on the Language and choose the language that you want for your app.
- After selecting, your app will turn into the language you prefer.
Which Languages Are Supported in Travel Animator?
Travel Animator is designed with a truly global audience in mind, which is why the app currently supports 30+ languages. We know that every creator feels more comfortable working in their native language, and having that flexibility makes the animation process faster and more enjoyable.
When you select your preferred language inside the app, it doesn’t just change the interface language; it also reflects in your exported videos. Place labels and route details will appear in the language you’ve chosen. This feature ensures that your audience, no matter where they’re from, can clearly understand your travel story without any confusion.
For example, if you’re creating an animation for local viewers in Spain, you can export with Spanish labels. Or if your audience is global but mostly from Japan, you can choose Japanese to make your journey more relatable.
By supporting multiple languages, Travel Animator bridges the gap between creators and their audiences, making your travel animations more personal, accessible, and impactful.
Tips for Using Travel Animator in Your Preferred Language
- Decide the app language at the beginning so all place names and labels appear consistently if you’re creating a video for a global audience.
- You can switch languages between exports to match each viewer group if you are working on multiple videos for different audiences.
- Before exporting, review your animation to ensure that place names are displayed correctly in the selected language.
- Travel Animator continuously adds and improves translations. Updating ensures you always get the latest language refinements.
- If your audience speaks multiple languages, consider exporting one version in English and another in your preferred language.
Localizing More Than the Menus
Switching the app language is one step. If you’re making a video for viewers in a particular country, a few other settings matter just as much.
- Units. Viewers in most of Europe expect kilometres, and viewers in the US expect miles. Set the unit in preview to match. Here’s how to change the units.
- Your own text. Captions and titles you add appear exactly as you type them, so write them in your viewers’ language. Fonts, frames and colors are covered in customizing text.
- Place names. If a label comes through long or awkward, rename it in preview under Place Labels, then Edit Labels, using the pencil icon next to the location.
- Flags. On a route that crosses borders, country flags work in every language.
Say you’re making a clip of a Douro Valley drive for a Spanish-speaking audience. Switch the app to Spanish, set the units to kilometres, write your captions in Spanish and check every place label in preview before you export.
Common Questions About Travel Animator's Language Settings
Why did Travel Animator open in a language I didn’t choose?
The app picks its default language from your device’s language setting. If your phone is set to Spanish, Travel Animator opens in Spanish the first time you use it. To change it, open the main settings from the top right of the home screen, scroll to Language in the Account section and choose the language you want. The change applies straight away.
Can I write captions in a different language from the app?
Yes. The app language controls the menus and buttons, while any text you add with a text overlay appears exactly as you type it. You can keep the app in English and write captions in French, Hindi or Japanese for a particular audience. Preview the animation to check that your chosen font displays the text clearly.
Can I use Travel Animator in Arabic?
Yes. Arabic is one of the supported languages. Select it from the Language option in settings and the whole interface switches over, including menus, buttons, route tools and the customization options for models, text and images. You don’t need to log in or restart the app for the change to apply.
FAQS
Can you change the language in Travel Animator anytime?
Yes, you can change the language anytime in Travel Animator. If you need a specific language for a video, simply switch to that language before exporting, and then change it back afterwards.
Is Language Selection Different in Travel Animator Free vs Pro?
No, everything is the same. Both Free and Pro users in Travel Animator have access to the same language options.
Do we need to log in to change the language in Travel Animator?
No, you don’t need to log in to change the language in Travel Animator. The language settings are available to all users directly within the app.
What if some parts of the app still appear in English after changing the Travel Animator language?
In rare cases, some parts of Travel Animator may still appear in English after changing the language. This usually happens if certain phrases or features haven’t been fully translated yet. The core features, place names, and export outputs will still reflect your selected language.
With the interface switched over, you can go further and build the map itself in Arabic — labels, text and all.
Make Travel Animator Work for You
Choose the best language that is more convenient for you or aligns with your audience’s needs. By customizing the app language, you can make your travel animations more personal, clear, and engaging for viewers all around the world. Try to create your travel animation using engaging models, maps, and different languages.